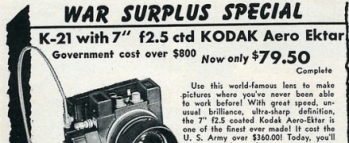
By Jo Lommen
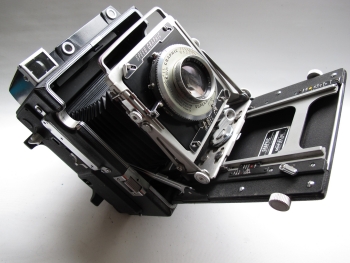
"Aero Speed Graphic"
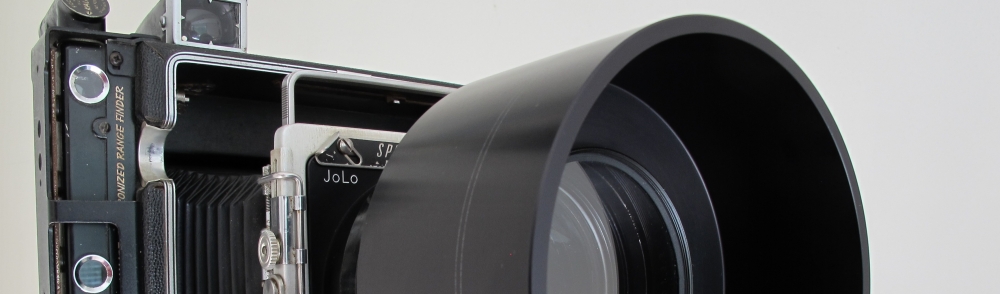
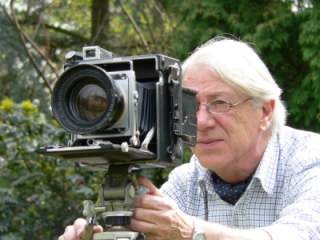
Quite a surprise to find a 1940 Kodak 7 Inch Aero Ektar lens mounted on a 1953 Speed Graphic. Apart from the fact that it sure looks good, it's quite exciting to take pictures with this extreme Graflex machine, once loved by press photographers all over the world, now powered by a second world war Kodak Aero Ektar reconnaissance lens. This is the so called David Burnett Combo as a salute to the world famous prize winning photographer who uses this heavy beauty, to create his breath taking pictures, which many of them already have been published by leading American and international magazines.
A bit of history...
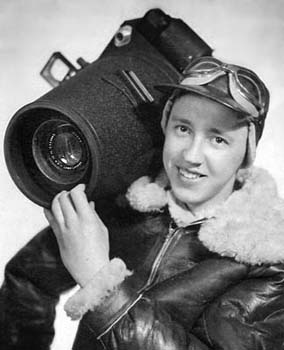
TSgt. Al Ciurczak dressed for shooting from an open window at high altitudes.
Photo: International Combat Camera Association.

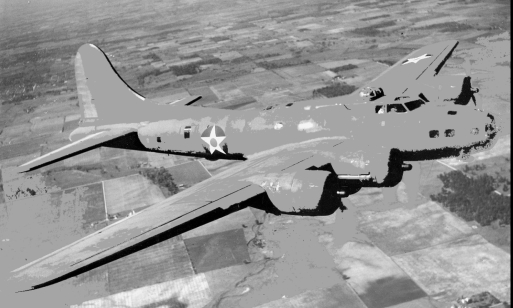
It all began after the end of World War II. These lenses served during the war in reconnaissance missions The lens was mounted in the huge Graflex K-21 camera to photograph the world, or what was left of it, after the Flying Fortress such as the B17, had visited the theatre of war. Battle fields, towns, industrial and other strategic targets. Originally made for military purposes by Kodak and sold to the US ministry of defence for about US $ 360 a piece, half as much money as a brand new Chevrolet Master DeLuxe would have cost in those days. After World War II, these lenses where sold as a bargain for about 79 US $ to professional photographers mainly for use in their studios as a portrait lens. In the first decade of this century, the Kodak Aero lens was rediscovered by David Burnett who took up the artistic challenge to use a classic press camera equiped with the odd reconnaissance lens to capture fantastic photos. In a world gone mad over digital photography, his professional photographic kit includes a 60 year old Speed Graphic press camera. David Burnett captured perfect shots of politicians on campaign as well as sportsmen as they were doing their greatest performances on the Olympic games. According to the American Photo Magazine, David Burnett was named one of the "100 most important People in Photography". To find out how to dismount the Aero lens from the K-24 camera follow this link


The Equipment
Great photographers from all over the world, try to gain the knowledge of this magnificent way of creative artistic photography. Unfortunately there is no photo shop around the corner that has such an equipment on stock. You'd need three items to create your own Aero-Speed-Graphic camera. First of all the 4x5 inch Pacemaker Speed Graphic camera. Secondly the 7 Inch Kodak Aero lens and at last but not at least, the JoLo lens board to build both components together to complete your personalised 45" Aero Speed Graphic Combo. So far the hardware but it is obvious that furthermore you need to have the skills of the analogue photography and for some of us, that is more than one can imagine. Camera and lens weights about 4,5 Kg (10 lb) so those who are used to work with light digital equipment should realise that before they decide to going to work with such a beast that it is is also physical a heavy job.
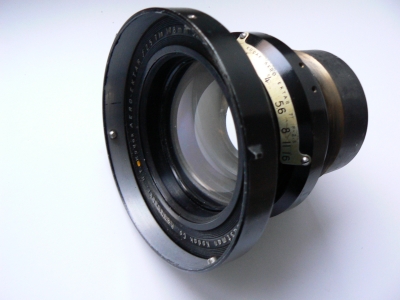
The Lens
Nowadays you may find a suitable Aero lens on eBay. Unfortunately the price will be a bit higher than US$ 79,50 as they would have cost in the forties. Prices up to 500-900 US $ is no exception, depending on demand and quality. Sometimes even a complete K21 camera including a brand new lens can be found on eBay. The 7 inch Kodak Aero lens features a minimum aperture of f/16 and a maximum aperture of f/2.5, allowing the photographer to capture quality images under a wide variety of lighting conditions. With its fixed focal length of 178 mm, this Kodak lens is great for capturing a single distant subject and featuring it prominently in the image. The 7 inch Kodak Aero is an extremely tightly focused lens, meaning that in close focus situations the depth of field can be measured in millimetres. Beside that the Kodak Aero Ektar 178 mm f/2.5 lens features 16 diaphragm blades, necessary to maximize the roundness of the aperture opening and thus minimize rays coming from a light source or reflections. This allows photographers using this 178 mm f/2.5 lens to be extremely detailed with what they focus on most. Some of these Aero lenses are used or even abused, some of them just used with marks of intensive wear but in a good shape and some of them are almost as new. Ask the seller for more details or better photos. Do not bid on Aero lenses "sold as is" and "I don't know nothing about lenses" unless the pictures are looking very good and you feel very sure about the offer and the seller. Preferable Aero lenses should have a lens bezel. A front lens cap and rear lens cap would be more than welcome. The diaphragm mechanism should be working perfect. De diaphragm blades should be dry but running smooth. No dust particles inside the housing of the lens and between the lens cells. Front lens should be free from cleaning marks. To determine the year of manufacturing, use the "camerosity" code, where C=1, A=2, M=3, E=4, Y=0 etc. EA= 1942. EE = 1944 etc.
The Camera
A brief summary of Speed Graphic cameras.
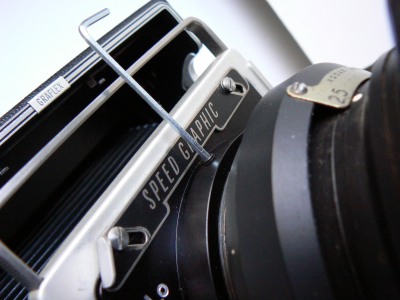
There are two Speed Graphic cameras. The Anniversary and the Pacemaker Speed Graphic. Please follow this link to find out how to distinguish between both cameras. As there is no special Anniversary JoLo lens board available anymore, we skip and go directly to the Pacemaker Camera. Unlike the Graflex Crown, the Graflex Speed Graphic has been equipped with a Focal Plane shutter which can be fired by a build in release knob on the right side of the camera. The Focal Plane shutter, allows the use of barrel lenses which is essential for our purpose. Lenses like the Aero lens do not have a build in leaf shutter in between the lens. The Crown Graphic Camera misses the focal plane shutter. In one glace you can see without further knowledge that the camera with the winding key is the Speed Graphic. The Crown Graphic misses the winding key on the right side of the camera house. A closer look learns that it misses the read out window, the Front-Back switch as well as the flash bi-post. Once you are sure to deal with a Pacemaker Speed Graphic, you may notice that there are two backs, the Spring back and the Graflok back. Whether the camera has a Graflok back or Spring-back, is not essential. However a Graflok back is preferable, especially for use with a Roll film holder. The Spring back camera used to be equipped with the Kalart Rangefinder while the Graflok back camera is mostly equipped with the Top Mounted Graphic rangefinder. Personally I prefer the Kalart Side Mounted range finder. The Kalart rangefinder can be adjusted for the 7 inch Kodak lens, while the Graphic Top Mounted rangefinder needs a special cam for each different lens. Unfortunately there is no 7 inch cam available.
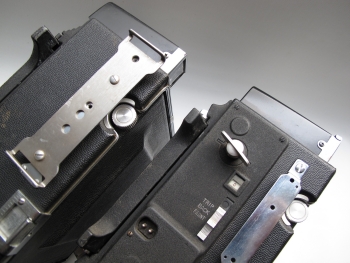
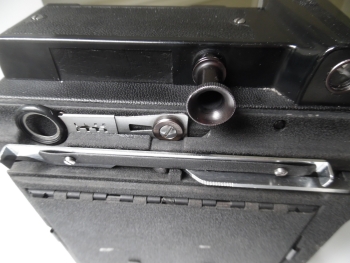
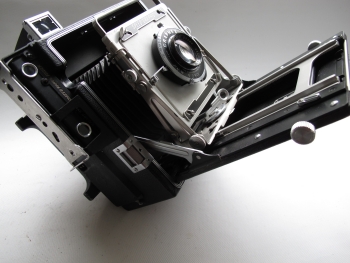
Photo on the left shows two cameras. The one on
the left is the Crown which is not suitable for our project.
On the
right the Pacemaker Speed Graphic with the winding key. Note: The flash brackets
are not relevant.
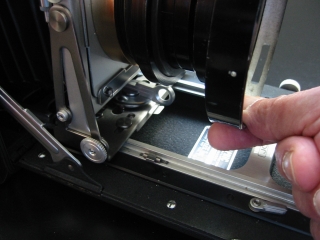
Photo on the right side shows a close up of the desirable Graflok
back. Note the chrome hinged slides.
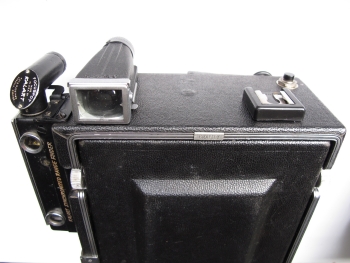
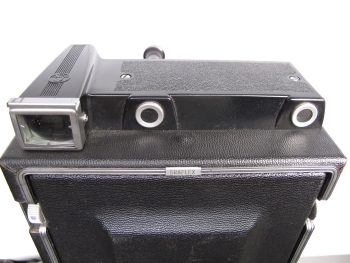
Both photos on the left show the "side mounted" Kalart rangefinder and on the right the "Top Mounted" rangefinder. Don't get misled by the rangefinder as the Speed Graphic as well as the Crown Graphic may have a Top Mounted or a Side mounted rangefinder. Essential is however the winding key. Only the Pacemaker camera with the winding key is suitable for use with the Aero lens. The Pacemaker camera is the one with the chrome trims and the build in shutter release. You'll find these cameras quite often on eBay. It is however not always very clear to identify the right camera for your project. Always ask the seller if the focal plane shutter is present and if it works. If the focal plane shutter is missing or does not work properly you may contact me for repair or replacement. The focal plane shutter is essential for working with the Aero lens.
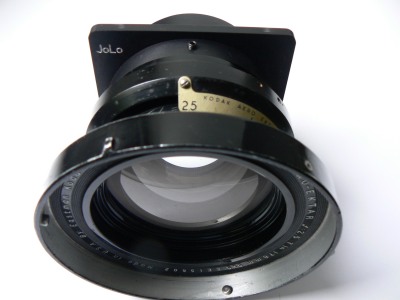
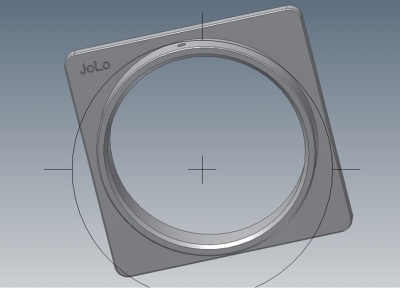
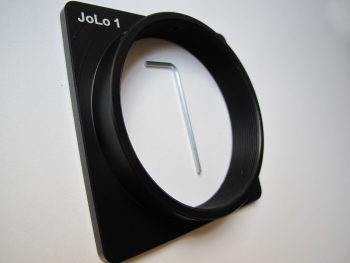
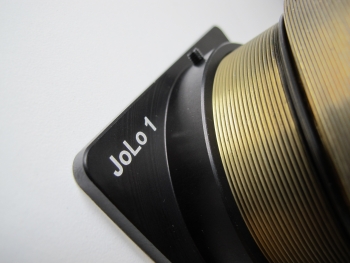
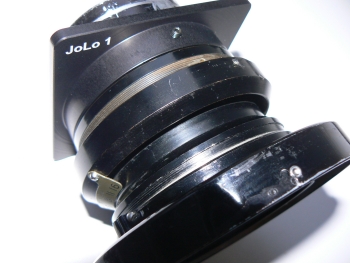
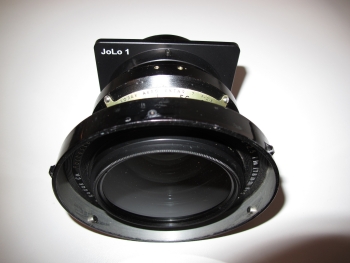
The JoLo Lens Board.
To make it clear, without the JoLo lens board you wont be able to create your Aero Speed Graphic Combo. My fist steps to find a solution to couple the heavy Aero lens to the camera lens standard was a poor designed home made flat lens board with two bronze rings. One ring served as a sort of spacer and the other was the retainer ring. Beside that, a second smaller lens board was mounted on the backside serving as a light trap. The second generation was already a cup shaped lens board like the original Graflex and again I used the two bronze rings for fastening the lens to the board. Unfortunately both designs were too heavy and too complicated to work with. As we all know, without a good fitting lens board there is no reliable connection of the Aero lens and the camera thinkable. To mount the Aero lens on the Pacemaker lens standard I designed an aluminium copy of the original lens board and completed it with an integrated Whitworth fitting mount for the Aero thread. Made by professionals in highly equiped computerised workshops, the JoLo Mark III lens board is specially designed and manufactured to couple the Pacemaker Speed Graphic camera with the Kodak 7"Aero Ektar lens. The heavy lens should be coupled without any play to the lens standard. In more than 6 years of its existence it has proven to be the best solution to couple camera and lens. Reliable solid construction and clever design makes it possible to exchange lenses in a second. The Whitworth thread is of high technical quality to fit exactly to the lens rear. The accurate fitting of the board to the lens standard and the 100 percent lightproof design reflexes the high standard of such an optical product. There is no need for a retainer ring or any other brackets or fastening material. Just place the lens board into the lens standard and find the right adjustment by turning the lens into the thread of the board for or backwards until the infinity image on the ground glass is crispy sharp. Then fix this position by fastening the hex screw. Slide the infinity stops against the lens standard, fix their position and you're ready to calibrate the Kalart rangefinder. Many JoLo mark III lens boards have found their way to professional photographers all over the world to the satisfaction of the users.
Note:
The JoLo Mark III lens board
is exclusively
made for the Pacemaker Speed Graphic and it does not fit to the Anniversary Speed Graphic.
Attention: this JoLo Aero lens board adapter for the Speed Graphic is the only
one made with the

Threaded fitting Board
joining the Kodak Aero lens.
.
....I finally won an eBay auction to get one of these classic lenses which led to the second problem. How do I mount this beast on my Graflex Speed Graphic.Due to the fact that the Aero Speed Graphic is a camera for specialists and professionals, the JoLo mark III lens board is manufactured in small batches and not always available. If your interest has been awakened by the above and you want to learn more about the JoLo Lens board and its features, or want to order the lens board, please goto my hidden contact form
Complete your gear with the new JoLo Lens Hood
with integrated filter Holder
exclusively designed for the 7" Aero Ektar Lens.
Make your Aero operational under all circumstances.
To learn more of this indispensable and exclusively designed lens hood and filter holder for Kodak Aero,
please click here.
Yes...but it is not absolutely necessary, as you'll be able to focus on your ground glass!
As we learned before there are two different Speed Graphics. The one with the side mounted Kalart rangefinder and the other with the Graphic top mounted rangefinder. As you need a special cam, the Top Mounted Rangefinder can not be calibrated for the Aero lens. Calibrating the Kalart Rangefinder can be done but you'd need some skills. If you don't feel happy, leave it as it is and use your ground glass. However if you like to be undependable from your ground glass, since it takes time and quite some efforts, especially when taking pictures of sport or other events, you'll need to replace the infinity stops and adjust the infinity eccentric screw, next you'll have to recalibrate the Kalart Range Finder. After you finished this job, you can rely on the side mounted Kalart Range finder and shoot whenever you like, without first focusing on the ground glass.
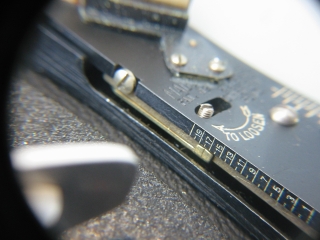
Adjusting the rangefinder begins with the replacing of the infinity stops. The infinity stops are normally set for a 127 or 135 mm focal length lens. To reset these stops unscrew the tiny little screws just enough to move the infinity stop fore and backwards. Place the Camera on a tripod and after mounting the Aero lens you may focus on a subject some hundred yards away using the ground glass and a good magnifier. Now when having the far away subject clear and sharp on your ground glass, you may slide the infinity stops against the front standard of the camera and fasten the little screws to lock the infinity stops at that position. Now you can recalibrate the rangefinder.
The Working
Not only
the impressive performance of yesterdays technique and design, but the
usability, reliability and challenge to creativity must be the motive to
take today's impressive pictures with this beautiful work horse of American
camera history. As far as focus is concerned, one tends to forget that
general-purpose large-format cameras, like Speed Graphics, were more likely used
with lenses that had maximum apertures around F:4.7 or smaller, and those lenses
were most often used stopped down several stops at least. Such small apertures
produce fairly large depths of field, and that tended to offset any inaccuracy
brought about by film holders with large clearances, or by film that wasn't held
perfectly flat. When the Aero lens is attached to the Speed Graphic, it's at
least a theoretical mismatch that requires perfect adjustment to deliver the
best
possible images from this unique combination.
The Fun

One of my
readers wrote: "...and lastly, you indeed will be hearing from me as it was you
and your site that started this fantasy of having the Graphic & Ektar
combination!
I remember seeing your site and just being amazed.
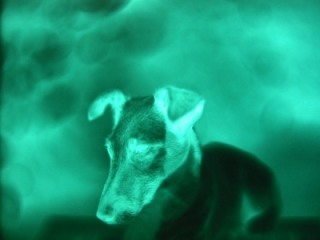
There is a photo you took, I think it might be your wife (??) reading a paper,
and thought it just looked like an image I had never seen before."
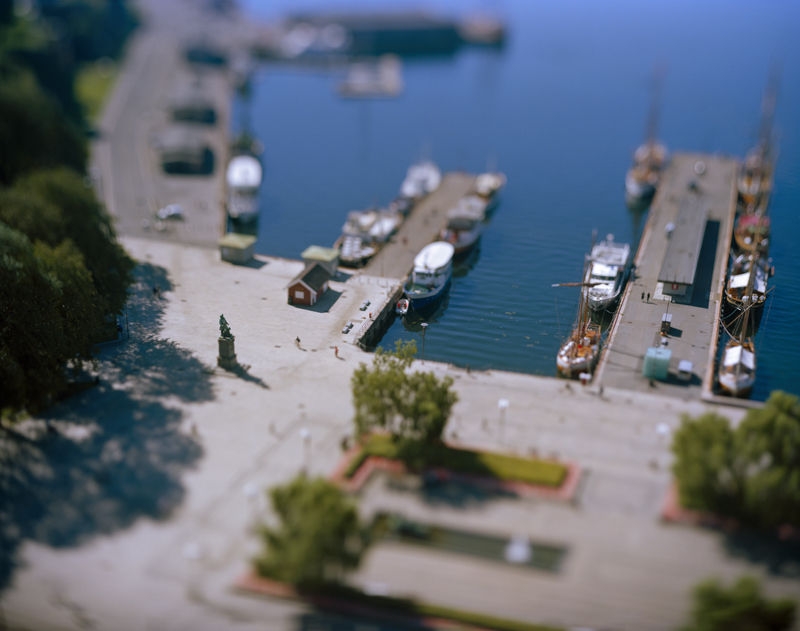
© Photo Jo Lommen. My wife Marjo reading the newspaper Harbour view by Bjarte Bjørkum - Author and Photographer Norway
Left: Speed
Graphic, Kodak Aero Ektar 2,5 - 1/1000 sec. distance 7 feet. Polaroid 59
It was a great pleasure for me to help
Bjarte almost on line with his Pacemaker Speed refurbishing project.
Including reinstalling a new curtain and completing the project by electronic
adjustment of the Focal Plane shutter.